SparkFun DataLogger IoT
The SparkFun DataLogger IoT is a data logger that comes preprogrammed to automatically log GPS and various pressure, humidity, and distance sensors. All without writing a single line of code! The DataLogger automatically detects, configures, and logs Qwiic sensors. It was specifically designed for users who just need to capture a lot of data to a CSV or JSON file and get back to their more extensive project. Save the data to a microSD card or send it wirelessly to your preferred Internet of Things (IoT) service!
This DataLogger IoT omits a built-in IMU. This version still supports auto-detection and logging of over a dozen sensors and GNSS receivers. Power up the DataLogger IoT, configure the board to record readings from supported devices, and begin logging! Data can be time-stamped when the time is synced to NTP, GNSS, or RTC.
The DataLogger IoT is highly configurable over an easy-to-use serial interface. Simply plug in a USB-C cable and open a serial terminal at 115200 baud. The logging output is automatically streamed to the terminal and the microSD card. Pressing any key in the terminal window will open the configuration menu.
The DataLogger IoT automatically scans, detects, configures, and logs various Qwiic sensors plugged into the board (No soldering! No programming!). Currently, auto-detection is supported on the following Qwiic products:
- Any u-Blox GNSS Modules (Lat/Long, Altitude, Velocity, SIV, Time, Date) such as:
- Distance:
- Pressure, Altitude, Humidity, and Temperature Data:
- BME280 Atmospheric
- LPS25HB Absolute Pressure
- MPR Series - MPRLS0025PA00001A MicroPressure
- MS8607 Pressure, Humidity, and Temperature
- MS5637 Barometric Pressure and Temperature
- AHT20 Humidity and Temperature
- SHTC3 Humidity and Temperature
- SDP31 Differential Pressure
- BMP384 Pressure and Temperature
- BMP581 Pressure and Temperature
- ENS160/BME280 Environmental Combo
- Air Quality and Environmental Sensors:
- CCS811 Air Quality (CO2 and VOC)
- ENS160 Indoor Air Quality Sensor (AQI, eCO2, TVOC)
- PASCO2V01 Photoacoustic Spectroscopy (CO2)
- SGP30 Air Quality (TVOC, CO2, H2, Ethanol)
- SGP40 Air Quality (VOC, Humidity, Temperature)
- SCD30 CO2, Humidity, and Temperature
- SCD40 CO2, Humidity, and Temperature
- BME680 Air Quality (Pressure, Humidity, Temperature, Gas, VOCs)
- BME688 Air Quality (Pressure, Humidity, Temperature, Gas, VOCs, VSC, CO, Gas)
- FS3000 Air Velocity
- SEN54 Environmental Sensor Node (Particle, VOC, Humidity, and Temperature)
- STC31 CO2 and Temperature sensor
- VEML6075 UV
- VEML7700 Ambient Light and Lux
- OPT4048DTSR Tristimulus Color and Mini
- AS7265x Triad Spectroscopy
- Temperature:
- AMG8833 Grid-EYE Infrared Array
- MCP9600 Thermocouple Amplifier
- PT100 ADS122C04 PR Temperature
- TMP117 High Precision Temperature
- Power:
- Real-Time Clock:
- RV8803 RTC Module
- NFC/RFID:
- ST25DVxxKC Dynamic NFC/RFID Tag
- Biometric Sensors:
- Weight:
- NAU7802 Qwiic Scale Load Cell Amplifier
- Miscellaneous:
- Qwiic Button
- Qwiic Twist RGB Rotary Encoder
- Analog Voltage:
The DataLogger IoT uses standard microSD cards to record clear text, comma-separated (i.e., CSV), or JavaScript Object Notation (JSON) files. You probably already have a microSD card, but if you need additional units, see the related items. Note that the DataLogger IoT cannot use any size microSD card. The DataLogger IoT supports 4-bit SDIO with microSD cards formatted as FAT32 and the older FAT16 (i.e., FAT) formats up to 32GB.
Low-power logging is supported. The DataLogger IoT can be configured to take readings about 26 times a second with the default sensors turned on or as slow as 1 reading every 24 hours. You choose! The DataLogger IoT has a built-in LiPo charging set at 500mA/hr. When sleep mode is enabled, the resulting sleep current is approximately 200µA.
With a 2.4GHz WiFi connection, you can also send data to the cloud! The following IoT services are supported:
- MQTT Client
- MQTT Secure Client
- AWS IoT
- ThingSpeak MQTT
- Azure IoT
- HTTP IoT
- MachineChat
- Arduino Cloud
New features are constantly being added, so we've developed two methods of updating the firmware on your DataLogger IoT! If you have a microSD card, you can download the firmware binary to the memory card and update the board through the configuration menu. If you have a WiFi connection, you can also update the firmware over the air using the configuration menu! No need to install Arduino or a bunch of libraries.
The SparkFun Qwiic Connect System is an ecosystem of I2C sensors, actuators, shields and cables that make prototyping faster and less prone to error. All Qwiic-enabled boards use a common 1mm pitch, 4-pin JST connector. This reduces the amount of required PCB space, and polarized connections mean you can’t hook it up wrong.
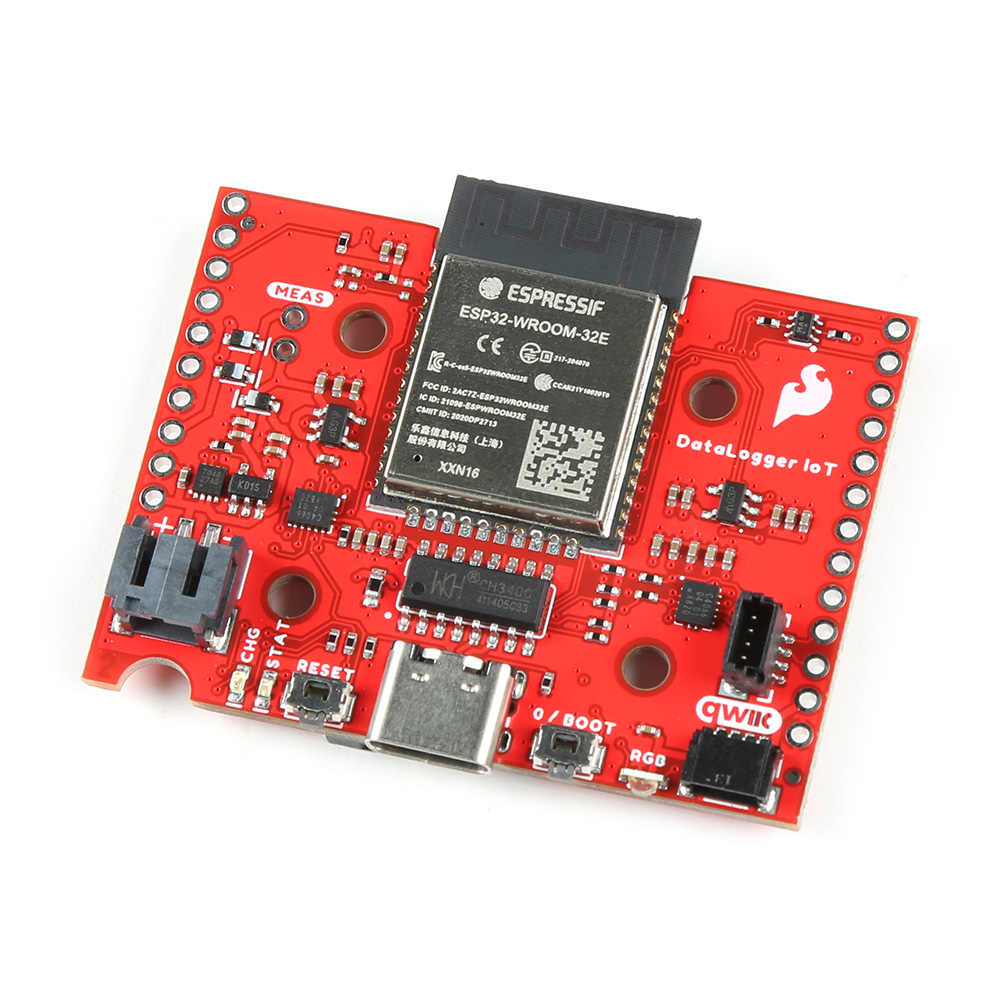
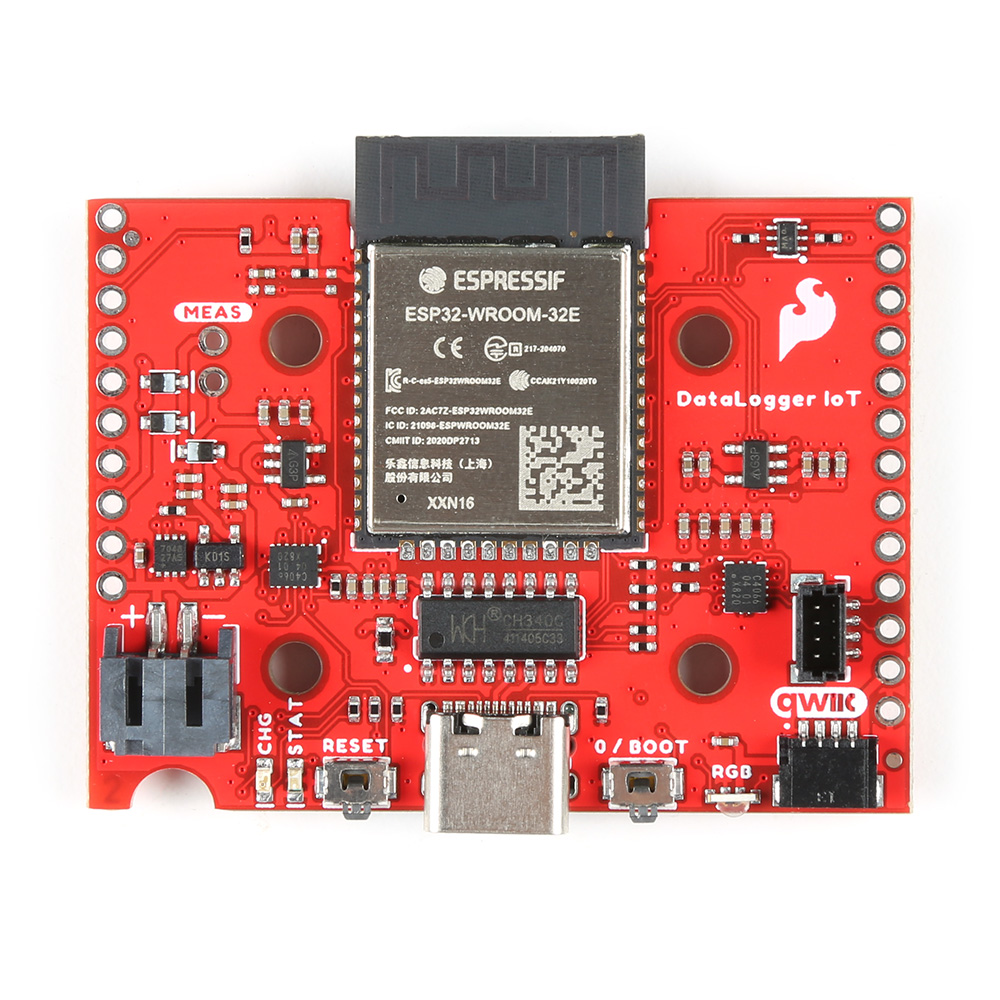
- ESP32-WROOM-32E Module
- Integrated 802.11b/g/n WiFi 2.4GHz transceiver
- Configurable via CH340C
- Operating voltage range
- 3.3V to 6.0V (via VIN)
- 5V with USB (via 5V or USB type C)
- 3.6V to 4.2V with LiPo battery (via BATT or 2-pin JST)
- Built-in MCP73831 single cell LiPo charger
- Minimum 500mA charge rate
- 3.3V (via 3V3)
- MAX17048 LiPo Fuel Gauge
- Ports
- 1x USB type C
- 1x JST style connector for LiPo battery
- 2x Qwiic enabled I2C
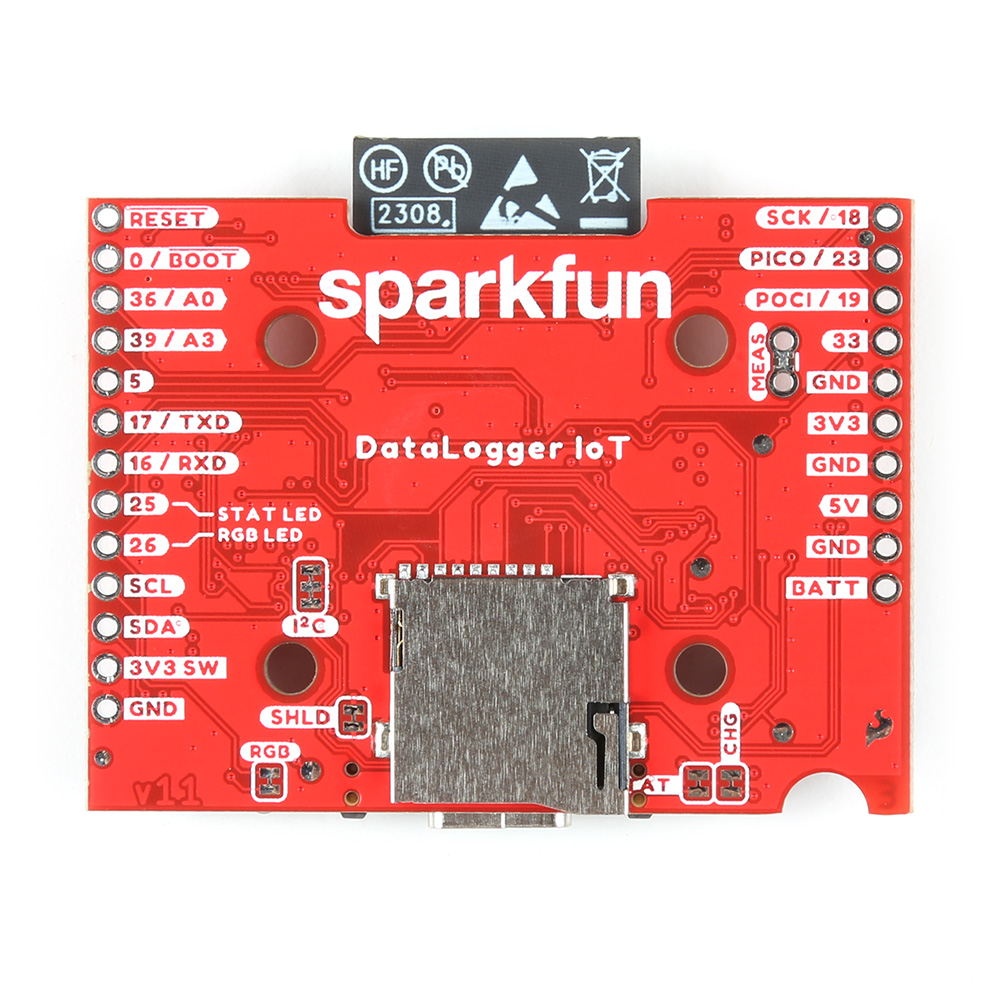
- 1x microSD socket
- Support for 4-bit SDIO and microSD cards formatted to FAT32
- LEDs
- Charge (CHG)
- Status (STAT)
- 1-Wire B3DQ3BRG Addressable RGB
- Jumpers
- Measure
- RGB LED
- Status LED
- Charge LED
- I2C pull-up resistors
- USB Shield
- Buttons
- Reset
- Boot
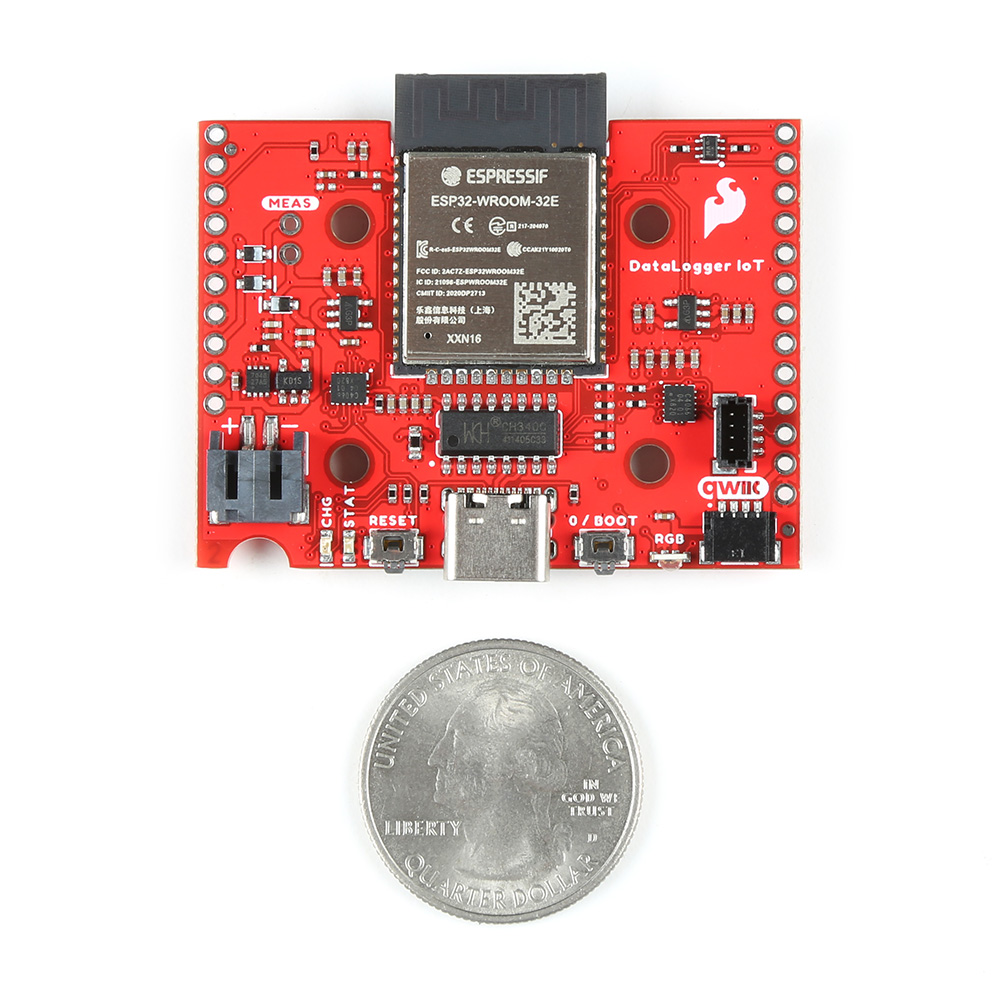
- Dimensions: 1.66in. x 2.00in.
- Weight: 10.65g
SparkFun DataLogger IoT Product Help and Resources
Core Skill: Electrical Prototyping
If it requires power, you need to know how much, what all the pins do, and how to hook it up. You may need to reference datasheets, schematics, and know the ins and outs of electronics.
Skill Level: Rookie - You may be required to know a bit more about the component, such as orientation, or how to hook it up, in addition to power requirements. You will need to understand polarized components.
See all skill levels
Comments
Looking for answers to technical questions?
We welcome your comments and suggestions below. However, if you are looking for solutions to technical questions please see our Technical Assistance page.
Customer Reviews
4 out of 5
Based on 1 ratings:
Works well
Could do with a few more free IO pins. I am using nearly every pin. Why such a small footprint? Big nuisance is the sdcard positioned exactly on the other side from the USB connector. Just makes a fiddly job getting the card in and out that much harder. However, a good choice of support hardware.


Using the IDE I can not seem to change several aspects of the DataLogger Io T set up. For example when I try to alter the log interval I am never given the change to enter a new value and instead it "updates' to the same value it had? Output below:
Select Option: 1
Settings for: /SparkFun DataLogger IoT/Settings/Logging Timer/Interval
Settings for: /SparkFun DataLogger IoT/Settings/Logging Timer
Settings: 1) Interval - The timer interval in milliseconds
Select Option: