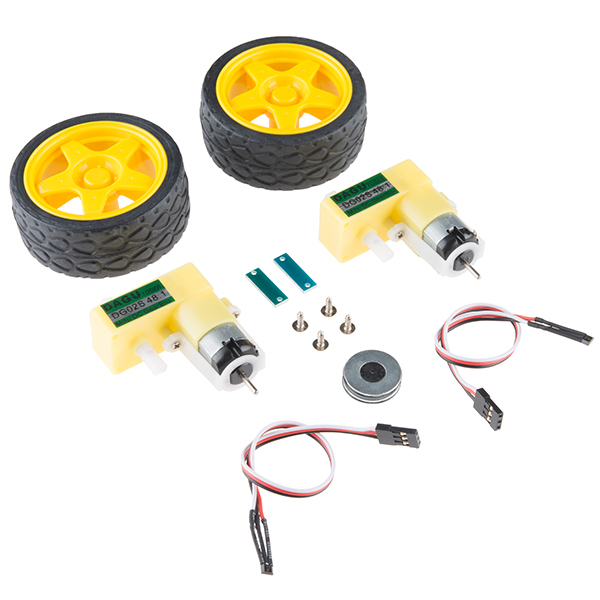
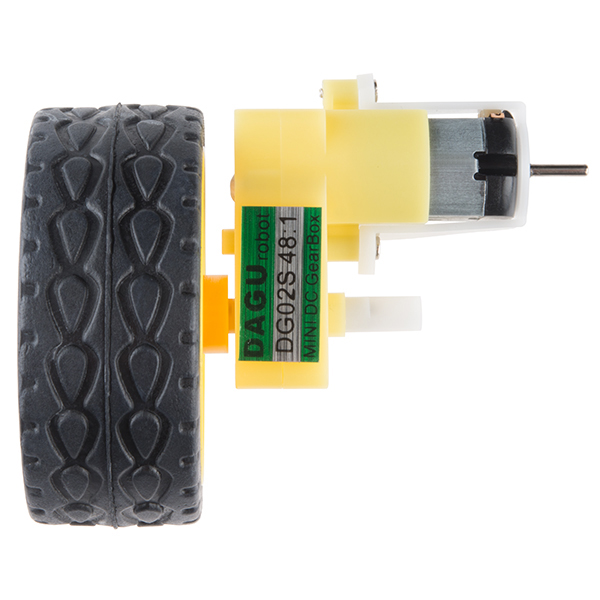
This is the Hobby Motor and Encoder Kit from DAGU, an inexpensive and reliable set of add-ons for your next robotic project. Inside this kit are three pairs of items: wheels, gearmotors, and wheel encoders (including everything you need to hook them up). The Hobby Motor and Encoder Kit is perfect for providing beginners with a cheap and easy to use setup or if you just need a few extra parts.
The off set gear motors included with this kit require a voltage of 3-6V with a no load current of 200mA and possess a stall current of 3A@6V (1.5A@3V), a gearbox ratio of 48:1, and a wheel speed of 65RPm at 3V unloaded. Each wheel encoder in this kit requires a supply voltage of 3-24V, a supply current of 4mA, consists of two neodymium 8-pole magnets with rubber hubs, and two hall-effect sensors terminated with 150mm cables and 3-pin female servo headers.
- 2x DG02S Mini DC Gear Motor
- 2x Wheel - 65mm
- 1x Wheel Encoder Kit (Set of 2)
- Gear Motor
- Voltage: 3V – 6V
- No Load Current: 200mA
- Stall Current: 3A @ 6V (1.5A @ 3V)
- Gearbox Ratio: 48:1
- Wheel Speed: 65rpm @ 3V unloaded (Recommended)
- Wheel Encoder
- Voltage: 3V – 24V with reverse polarity protection
- Encoder Type: 8-pole neodymium magnet and hall-effect sensor
- Encoder Output: Open drain with short circuit protection
Hobby Motor and Encoder Kit Product Help and Resources
0 of 1 found this helpful:
Shadow Chassis
NOTE: These do not work with our Shadow Chassis. For that, You'll want ROB-13302.
To make the equivalent of this SKU that would fit the Shadow chassis you need:
ROB-13302 (motors)
ROB-12629 (encoder kit)
ROB-13259 (wheel kit)
Core Skill: Robotics
This skill concerns mechanical and robotics knowledge. You may need to know how mechanical parts interact, how motors work, or how to use motor drivers and controllers.
Skill Level: Rookie - You will be required to know some basics about motors, basic motor drivers and how simple robotic motion can be accomplished.
See all skill levels
Core Skill: DIY
Whether it's for assembling a kit, hacking an enclosure, or creating your own parts; the DIY skill is all about knowing how to use tools and the techniques associated with them.
Skill Level: Noob - Basic assembly is required. You may need to provide your own basic tools like a screwdriver, hammer or scissors. Power tools or custom parts are not required. Instructions will be included and easy to follow. Sewing may be required, but only with included patterns.
See all skill levels
Core Skill: Electrical Prototyping
If it requires power, you need to know how much, what all the pins do, and how to hook it up. You may need to reference datasheets, schematics, and know the ins and outs of electronics.
Skill Level: Rookie - You may be required to know a bit more about the component, such as orientation, or how to hook it up, in addition to power requirements. You will need to understand polarized components.
See all skill levels
Comments
Looking for answers to technical questions?
We welcome your comments and suggestions below. However, if you are looking for solutions to technical questions please see our Technical Assistance page.
Customer Reviews
4 out of 5
Based on 4 ratings:
1 of 1 found this helpful:
Decent torque but unclear instructions
The motors get decent torque and the wheels have good grip, that's the good side.
I am completely lost on how to use the encoder kit; the data sheet is completely useless to me and the one site I've found that discusses these is beyond my understanding,
http://letsmakerobots.com/node/38636
http://letsmakerobots.com/node/39098
It would be very nice to see example code and hardware setup for using these with an Arduino, with and without a motor driver or H-Bridge since not everyone (me!) who buys these will have that motor driver or H-Bridge available. It would be nice if the description mentioned that this may be needed; us newbies don't always know what's needed :)
Without the encoder aspect, without the motor driver parts, and without PWM, I was able to turn these on using a 9v power supply and an 2N3904 transistor. That's as far as I've gotten. I don't even know what the two blue rectangles are for, but they're included in the package.
I would really like to know more about using these to their full capacity, does anyone have examples or links?
Hi, It's a little hidden, but there is actually a good bit of information on the encoders that can be found in the Redbot guide and code. Here's a link to the guide. https://learn.sparkfun.com/tutorials/redbot-assembly-guide-rev-02/wheel-encoder Cheers
Two Wheels with geared motors and encoders.
I like it so far, I've more to do with this set of parts. Have not tested the encoders yet but do not expect any difficulty. The price is very reasonable.
Tubing 1 size too big for one of the encoders
The tubing was 1 size too big for one of the encoders but correct for the other. That provided some difficulty down the line but was able to manage.
Other note: this will not work with the shadow chassis.
Other then that decent product.
Unknown
Bought the wheels and motors then started to build the frame to fit the wheels. I think the frame outgrew the wheels. time will tell...


Bought this a while ago and am just getting it going, with a Seeed Studio Driver board. With a 5V supply the driver drops almost 2V, so just over 3V at the motor, and I need to be at 70% to get the wheels to turn unloaded. I am using an ATX supply, and was wondering what the max V people have used. For example a 9V supply at 100% Duty will be 7V, and 9V is an awkward voltage (8v even more so), at 12V, lets me get to just under 10V at the motor.
Has anyone run these above spec like this?
I have not attached the encoders yet, so I am not using any feedback for speed control.
Edit -> No feedback after a few days here - I do have the encoders mounted and can use the RedBot library, able to get rotation counts. Really kinda frustrating since there are RedBot functions mixed in the code, and I am trying to use a different motor driver. Does anyone have Encoder Only library?
Sparkfun, any chance you could help find a coupler/axle for this motor? I need to extend the shaft (motor can't sit right next to wheel in my setup), but the shaft is an unusual shape. All the couplers and axles I'm finding are round. This guy is flat on both sides
I am trying to figure out how to assemble this. Are there any videos on how to assemble this?
Can anyone paste example code and setup for using these with an Arduino? A description of the parts and their uses and connections would be very helpful as well.
Check out the Redbot SIK it uses these encoders and basically the same motors (I believe they are straight and not right angle). assembly and code
The code for the redbot encoders don't work right. I am using the codebender plugin with it.
Try emailing techsupport@sparkfun.com with a description of your setup, your code, what you are expecting the code to do, and what it is doing and they should be able to help you out.
Do the gear motors have mounting holes or brackets? What is the best method to mount them? Drill holes in a board and zip tie them?
I have a similar motor/encoder and I'm using two sensors per motor to get quadrature encoding that allows me to detect the direction of rotation. Make sure the encoders are rigidly mounted to preserve the spacing...
So only one encoder? so one wheel is encoded?
1x Wheel Encoder Kit (Set of 2)
What do you mean by "three pairs of items"? I see only single pairs (two of 1 or 1 with 2).
That's got to be an "oops".
Two motors, two wheels, and two encoder kits. Three pairs.
The motor+gearbox torque specs seem to be missing from the description and the datasheet.
I googled around and this item looks similar:
Can someone from sparkfun confirm if thats the correct match?